Zones and Classes
Within the 'Location Basis' area, in the 'Configuration' tab (within 'Business Settings | Shipping and Handling') is an option labelled 'By Zone and Class'. You need to select this option if you want to calculate shipping charges online based on where the order is being sent, and how large the order is.
If you select this option, then you need to set up zones and classes within the 'Zone/Class Tables' tab.
Creating/Editing a Shipping Zone
A shipping zone is a group of countries that all have the same shipping options available to them. A country can be in more than one zone.
At the left the 'Zone/Class Tables' tab is a white box that contains an example list of zones and within each zone, a list of classes.
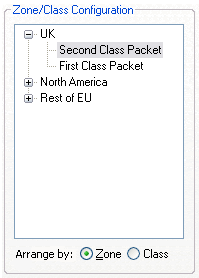
Note: If you set the list to be shown 'By Class' using the radio buttons at the bottom then you will have a list of classes in this box, with zones shown within each class.
This white box is configured using right-clicks.
To edit a shipping zone, right click on it and select 'Properties.'. You will see the following screen:

At the top is the name of the zone. Within the 'Members' list is a list of countries within the zone. At the right is a list of all the available locations within Actinic. These locations are configured within 'Settings | Locations.' (see Changing The List Of Countries And States for more details.)
To add a country to this zone, select a country or state in the right-hand list and click the '<' button to move it to the 'Members' list. Likewise, to remove a location from the 'Members' list, highlight it and click the '>' button.
Click 'OK' when finished.
To create a new zone, right-click within the white box and select 'New Zone.'. You will see the same screen as described above. You just need to give your zone a name and select some members for it with the '<' button.
Shipping Classes
A shipping class is a method of shipping that you want to offer to your customers.
To add a class to a shipping zone, right-click on a zone and select 'Add Class.'. Actinic comes with some example classes already. You can select one of these, or select 'New Class' to add a new one.
When you add a class, you see the following screen:
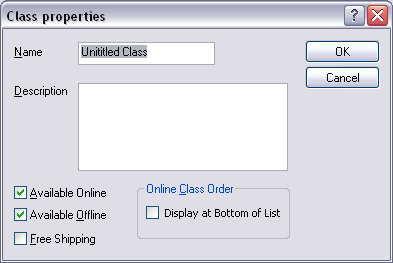
You can give your class a name and, optionally, a description. This description is only used within Actinic - it is not used on the web site.
Once you have created your class you can decide where this class is available. If you want it available on the website, but not when entering an offline order straight into Actinic, then de-select 'Available Offline'. Likewise, if you don't want this shipping method to appear online, and you only want it when you are adding an offline order, de-select 'Available Online'.
If you want this shipping class to always be free, then you can select the 'Free Shipping' checkbox. Use this for shipping methods such as 'Collect In Store'.
The final thing you need to do is specify the order that your shipping classes with be listed in. By default, shipping methods are always shown to customers in ascending order of cost - with the cheapest first. If you want to override this option, and have a shipping class appear at the bottom of the list of classes, then you can set the 'Online Class Order' option to 'Show at End of List'.
Once you are happy with your class, you can click 'OK'.
Free Shipping
If you want a particular shipping class to always be free, then you can select the 'Free Shipping' box in the class properties window.
If you want a particular product to always have free shipping, then simply select the 'Exclude From Shipping Band Calculation' box on the 'Details' tab of the product.
If you want all your customers, no matter where they are in the world, to get free shipping if their order value exceeds a certain amount, then select the 'Free Over' box in the 'Configuration' tab and enter a value into the box provided.
If you just want customers using a certain shipping class to get free shipping if their order exceeds a certain amount, then select the 'Orders in this Zone/Class Free Over' box at the bottom right of the 'Zone/Class Tables' tab. You can then enter a value in the field provided.
Calculation Basis for Shipping
Now you have created your zones and classes, you are ready to decide what basis you want to use for shipping. These calculation bases are described in Calculation Basis For Shipping.