Editing An Overall Page Layout Within Actinic
The overall layout contains all the design elements that do not change from page to page. These include:
· The content within the <head> </head> tags (including page title and meta tags)
· Logo and navigation elements that go across the top of each page
· Navigational elements that go down the side of each page.
Before editing the code in your overall page layout, make sure that you have selected one that is close to what you want your final overall layout to be. This will save a lot of work further down the line.
For instructions about selecting overall layout templates for your store, go to Page Layouts.
To begin the design process, you need to switch to the 'Design' tab.
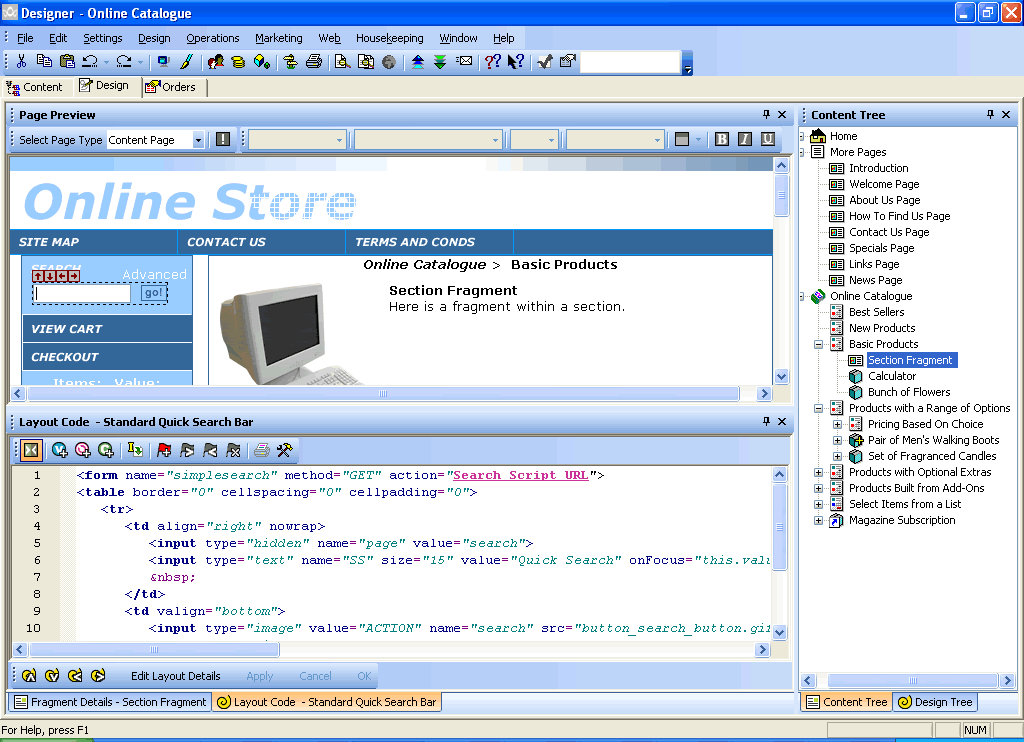
The 'Design' tab is made up of an interactive preview at the top of the screen, and a 'Code View' at the bottom of the screen, which contains the HTML code for the layout you are currently looking at.
There are two ways to approach editing the overall layout:
· Edit the layout you are currently using. For details on this, just go straight to 'Editing Your Layout', below.
· Create a new layout, based on the current layout.
Creating A New Overall Page Layout
Use these instructions if you want to create a new layout to edit, rather than editing the ones that came with Actinic.
1. At the right hand side of the Design tab, there are two trees in tabs. Check at the bottom of the right-hand panel and you will see a tab that says 'Content Tree'. Click on this to view the content tree.
2. Then click on a section in the tree. That section will then appear in the Design tab.
3. Then look at the bottom of the Design tab. You will see there are two tabs, one that says 'Layout Code' and one that says 'Section Details'. Click on the one that says 'Section Details'.
4. Switch to the 'Layout' tab within the 'Section Details' tab.
5. In the 'Overall Page Layout' field, scroll down the list until you get to '<New>'. Select this option.
6. Give your new layout a name in the 'Layout Name' field.
7. In the 'Based On' field, select the layout that your site is currently using.
8. Click 'OK'.
Your new layout will now be added to the list of layouts that come with Actinic.
You can now choose where to use it:
· To just use the new overall layout for this section, select it within the 'Overall Page Layout' field of the current section.
· To use this new layout for your entire store, you will need to select it within the 'Page Layouts' tab in 'Design | Themes' or the 'Layout' tab in 'Site Options'.
You will be able to use this new layout for your login, shopping cart and checkout immediately. You will need to make some changes to it before it is ready to use for a brochure page though. For details, see 'Brochure Overall Page Layouts, below.
Editing an Overall Page Layout
Before starting the edit, make sure that the page showing in the Design tab is the one you want to change.
Then use the tabs at the bottom to make sure the 'Layout Code' is visible. This will contain some HTML.
You then need to select the overall page layout to edit. To do this:
1. Click anywhere within the preview. This will select a layout that is used within the design, and put a dotted line around it.
Sometimes the alignment of text in the preview changes when you select an item in the preview. This is a normal side-effect of the interactive preview.
2. Keep
pressing the 'Navigate to parent layout' button -  - button on the bottom toolbar until the dotted
line goes all around the outside of the page
- button on the bottom toolbar until the dotted
line goes all around the outside of the page
You should now have the overall layout selected in the 'Layout Code' panel.
You can also create/edit the overall page layout using Dreamweaver. See Creating Actinic Outer Layouts in Dreamweaver for more.
As well as the HTML for the layout, you will also see the following:

Text Variables - these are replaced by values from Actinic. To find about a bit more what each one means, move your mouse over it. More details on variables can be found in Adding A New Variable.
Layout Selectors - these are used to include other layouts into the overall page layout (such as a company logo, or a best seller list etc.). These will either appear as the name of the layout selector, or the name of the layout that the selector is inserting. For more details about layout selectors, Using Layout Selectors.
Block Tags - these are conditional tags that will show or hide the content between them based on the settings in your store. For more details about block tags, see Inserting Conditions.
For more general help with editing layouts, see Editing Layouts.
A list of all the variables and selectors you might find in an overall page layout is in Overall Page Layouts.
Tips
· Use the 'Undo' button on the toolbar if you have made a change that you are not happy with.
· Don't remove the layout selector called 'INNERLAYOUT'. This inserts the main content of the page.
· The content within the <head>.</head> tags should only be changed if you are adding in script functions, CSS styles or other similar content.
· The stylesheets for Actinic pages are called 'actinic.css' and 'theme.css'. These contain some layout information for the page, and are worth looking at if something is not obvious in the HTML. For more information on stylesheets, see The Actinic Style Sheet.
· If there is something you want to change, but the code for it is not in the Overall Page Layout, trying clicking on the thing you want to change in the preview and see what code appears in the 'Layout Code' tab.
· If you have Dreamweaver, you can use that to edit the overall page layout. See Creating Actinic Outer Layouts in Dreamweaver.
Brochure Overall Page Layouts
Brochure page layouts are selected separately from other overall page layouts.
If you want to take the code you have edited and use it in brochure pages, then you need to do the following:
1. Select an overall page layout for your brochure pages that you can overwrite. The best way to do this is probably to create a new brochure overall page layout, described in 'Creating A New Overall Page Layout' above.
2. Copy and paste the HTML code from your standard overall layout template into your brochure one.
3. Click 'Apply'.
There are a few things you should check now before using the layout.
· If you want to use the 'Brochure Page Logo' (see What Are Brochure Pages?) rather than the store logo within your brochure pages, make sure any instances of the 'CompanyLogo' layout selector are replaced with 'BrochureLogo'.
· If you want to insert a brochure navigation bar, then insert the 'BrochurePageList' layout selector.
For more information on using layout selectors, see Using Layout Selectors.